What-If analysis allows you to quickly make and compare predictions. In this article, you will learn how to make and compare individual predictions to evaluate model performance.
This feature is available under the following 2 conditions:
-
The model is deployed; and
-
The deployment is active.
Step 1 - Navigate to the Explainability tab
-
Navigate your way to the models listing page by clicking on “Models” on the left navigation
-
Select the model you want to use to make individual predictions
-
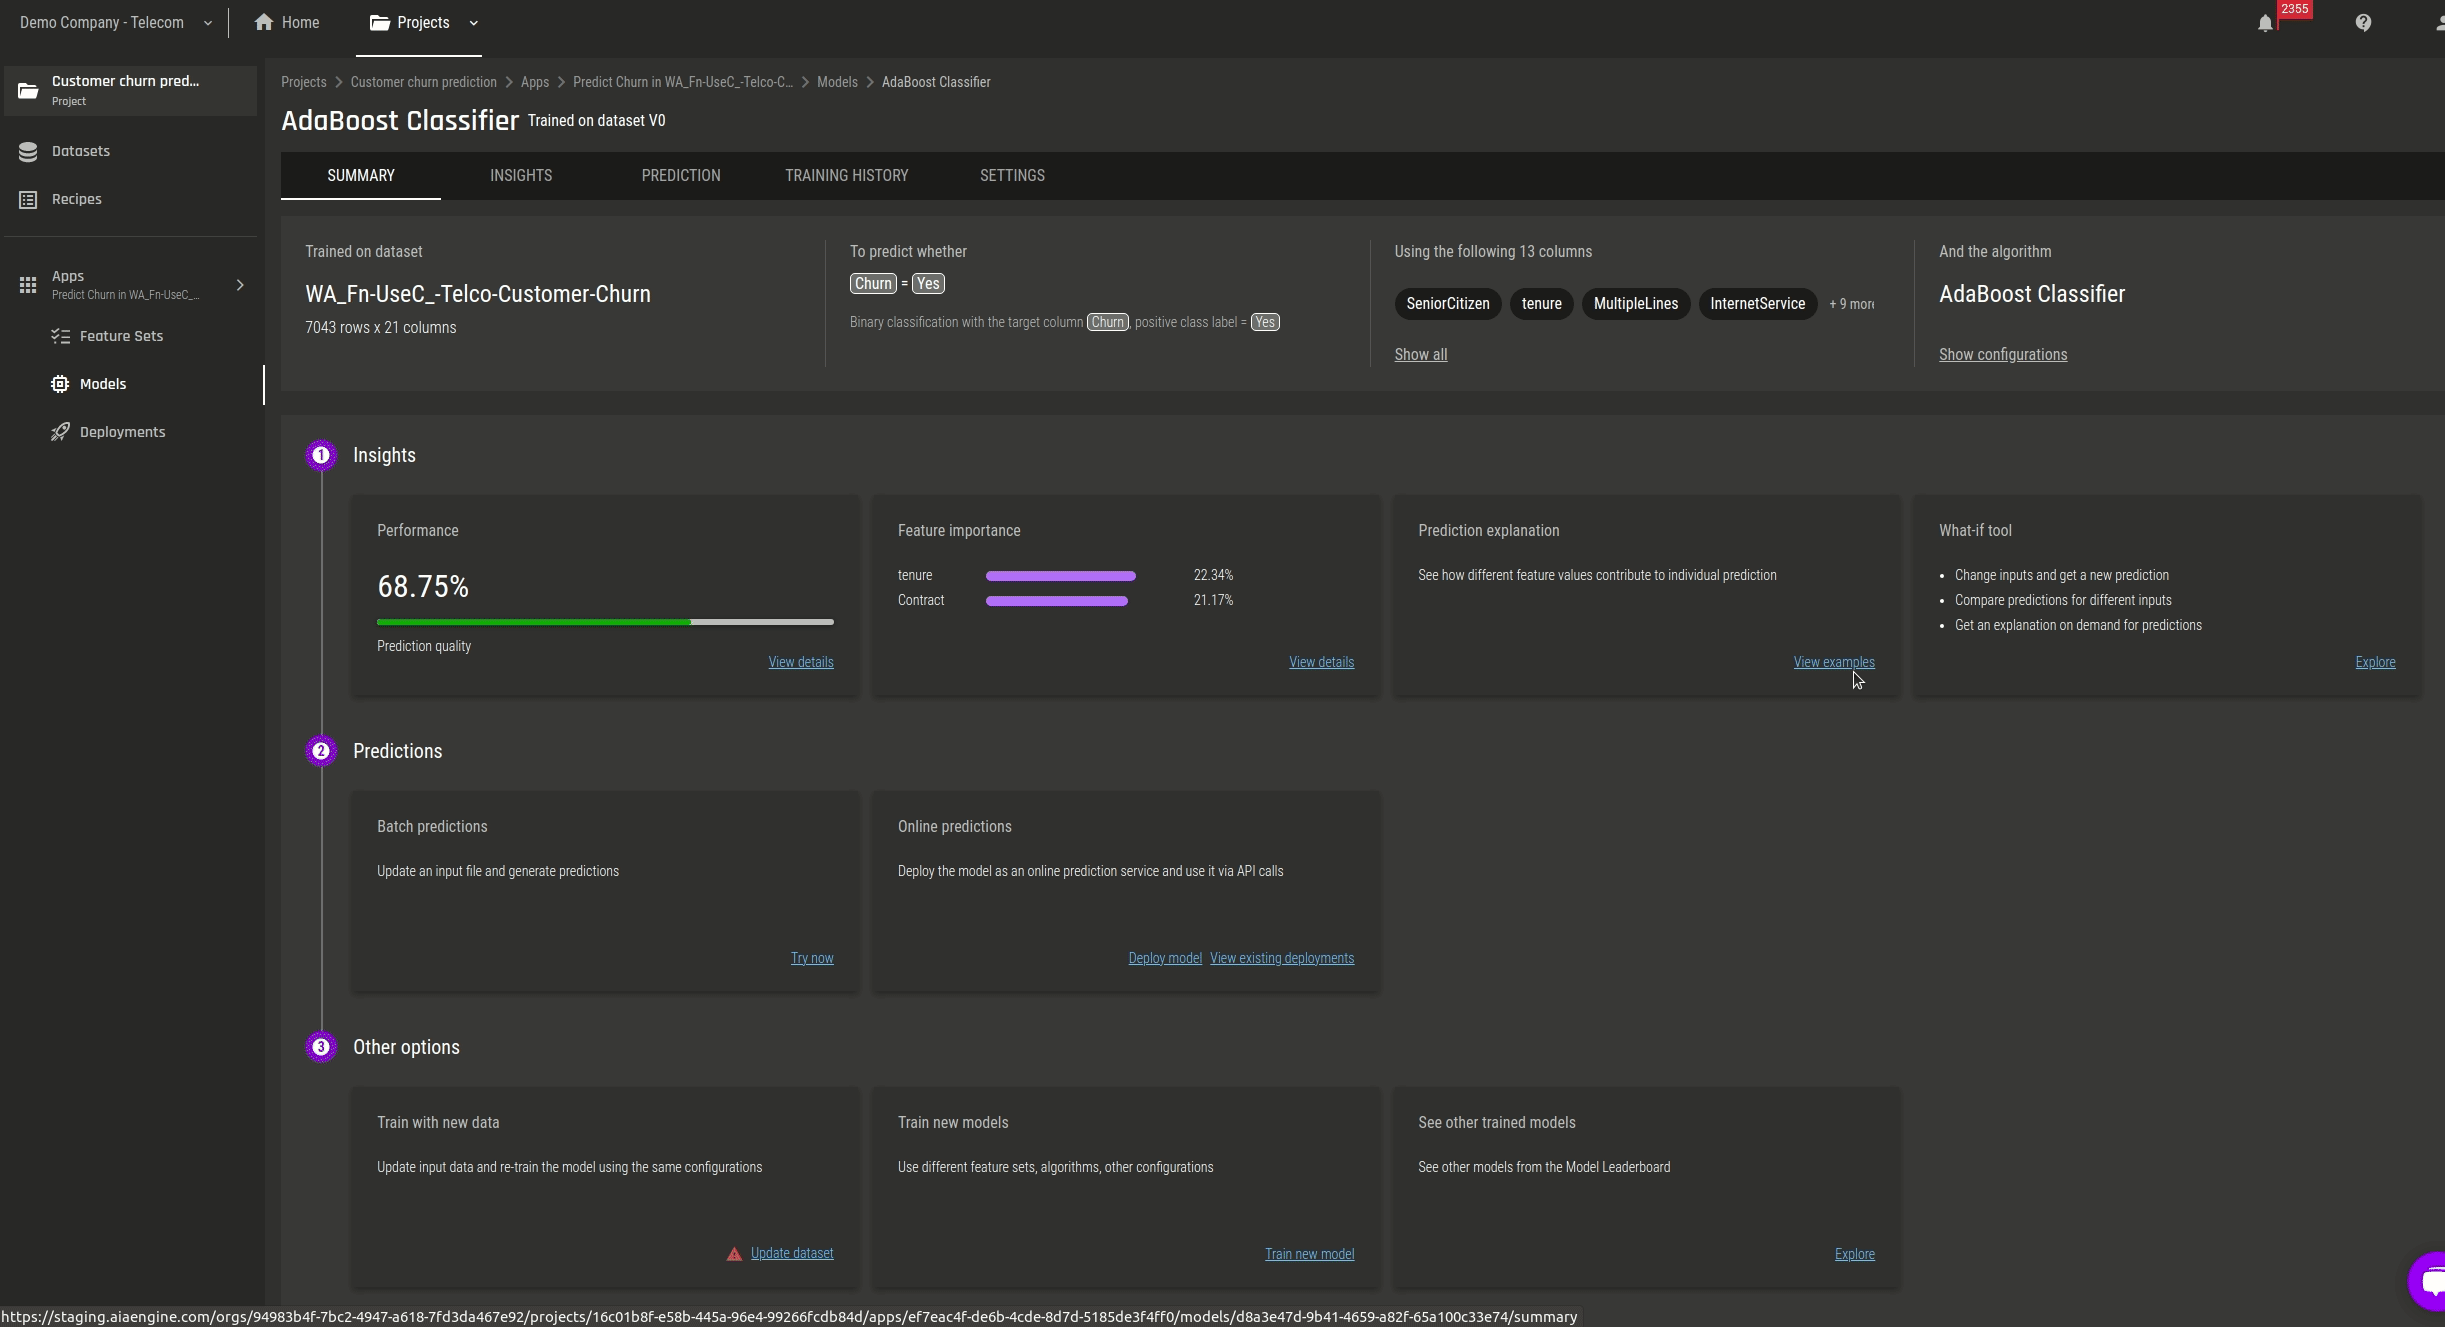
On the selected model’s summary page, click on the “What-if tool” card under “Insights”
-
Or you can also go the “Insights” tab and click on the “What-if tool” sub-tab.

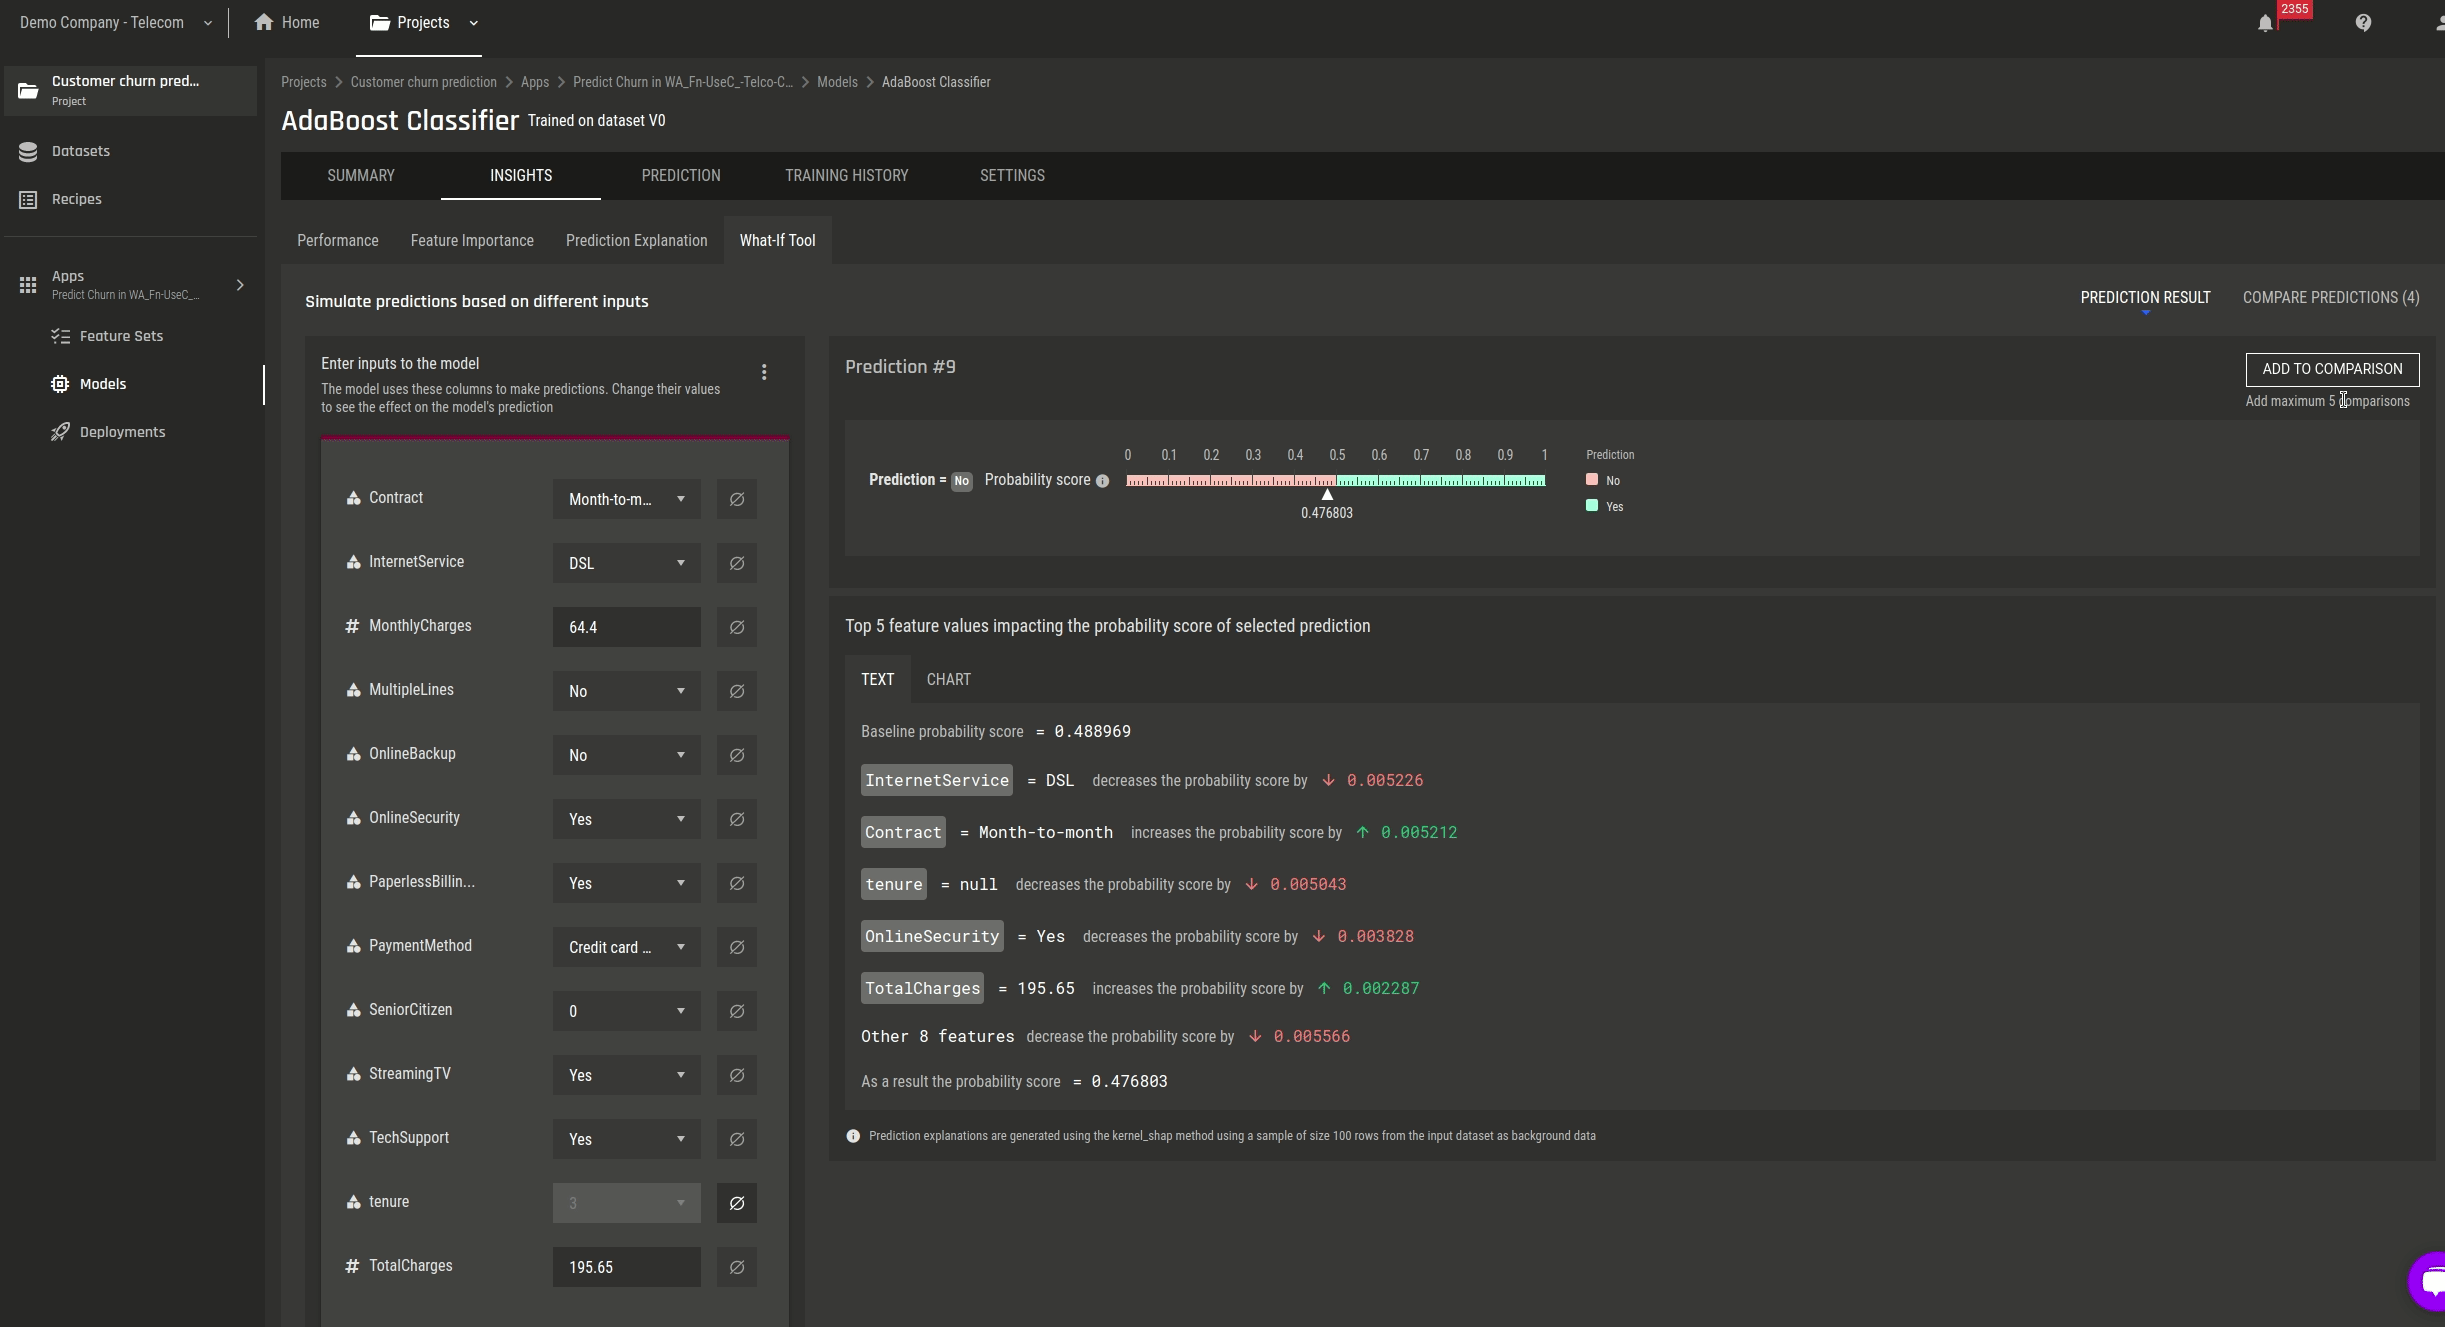
Step 2 - Make a prediction
-
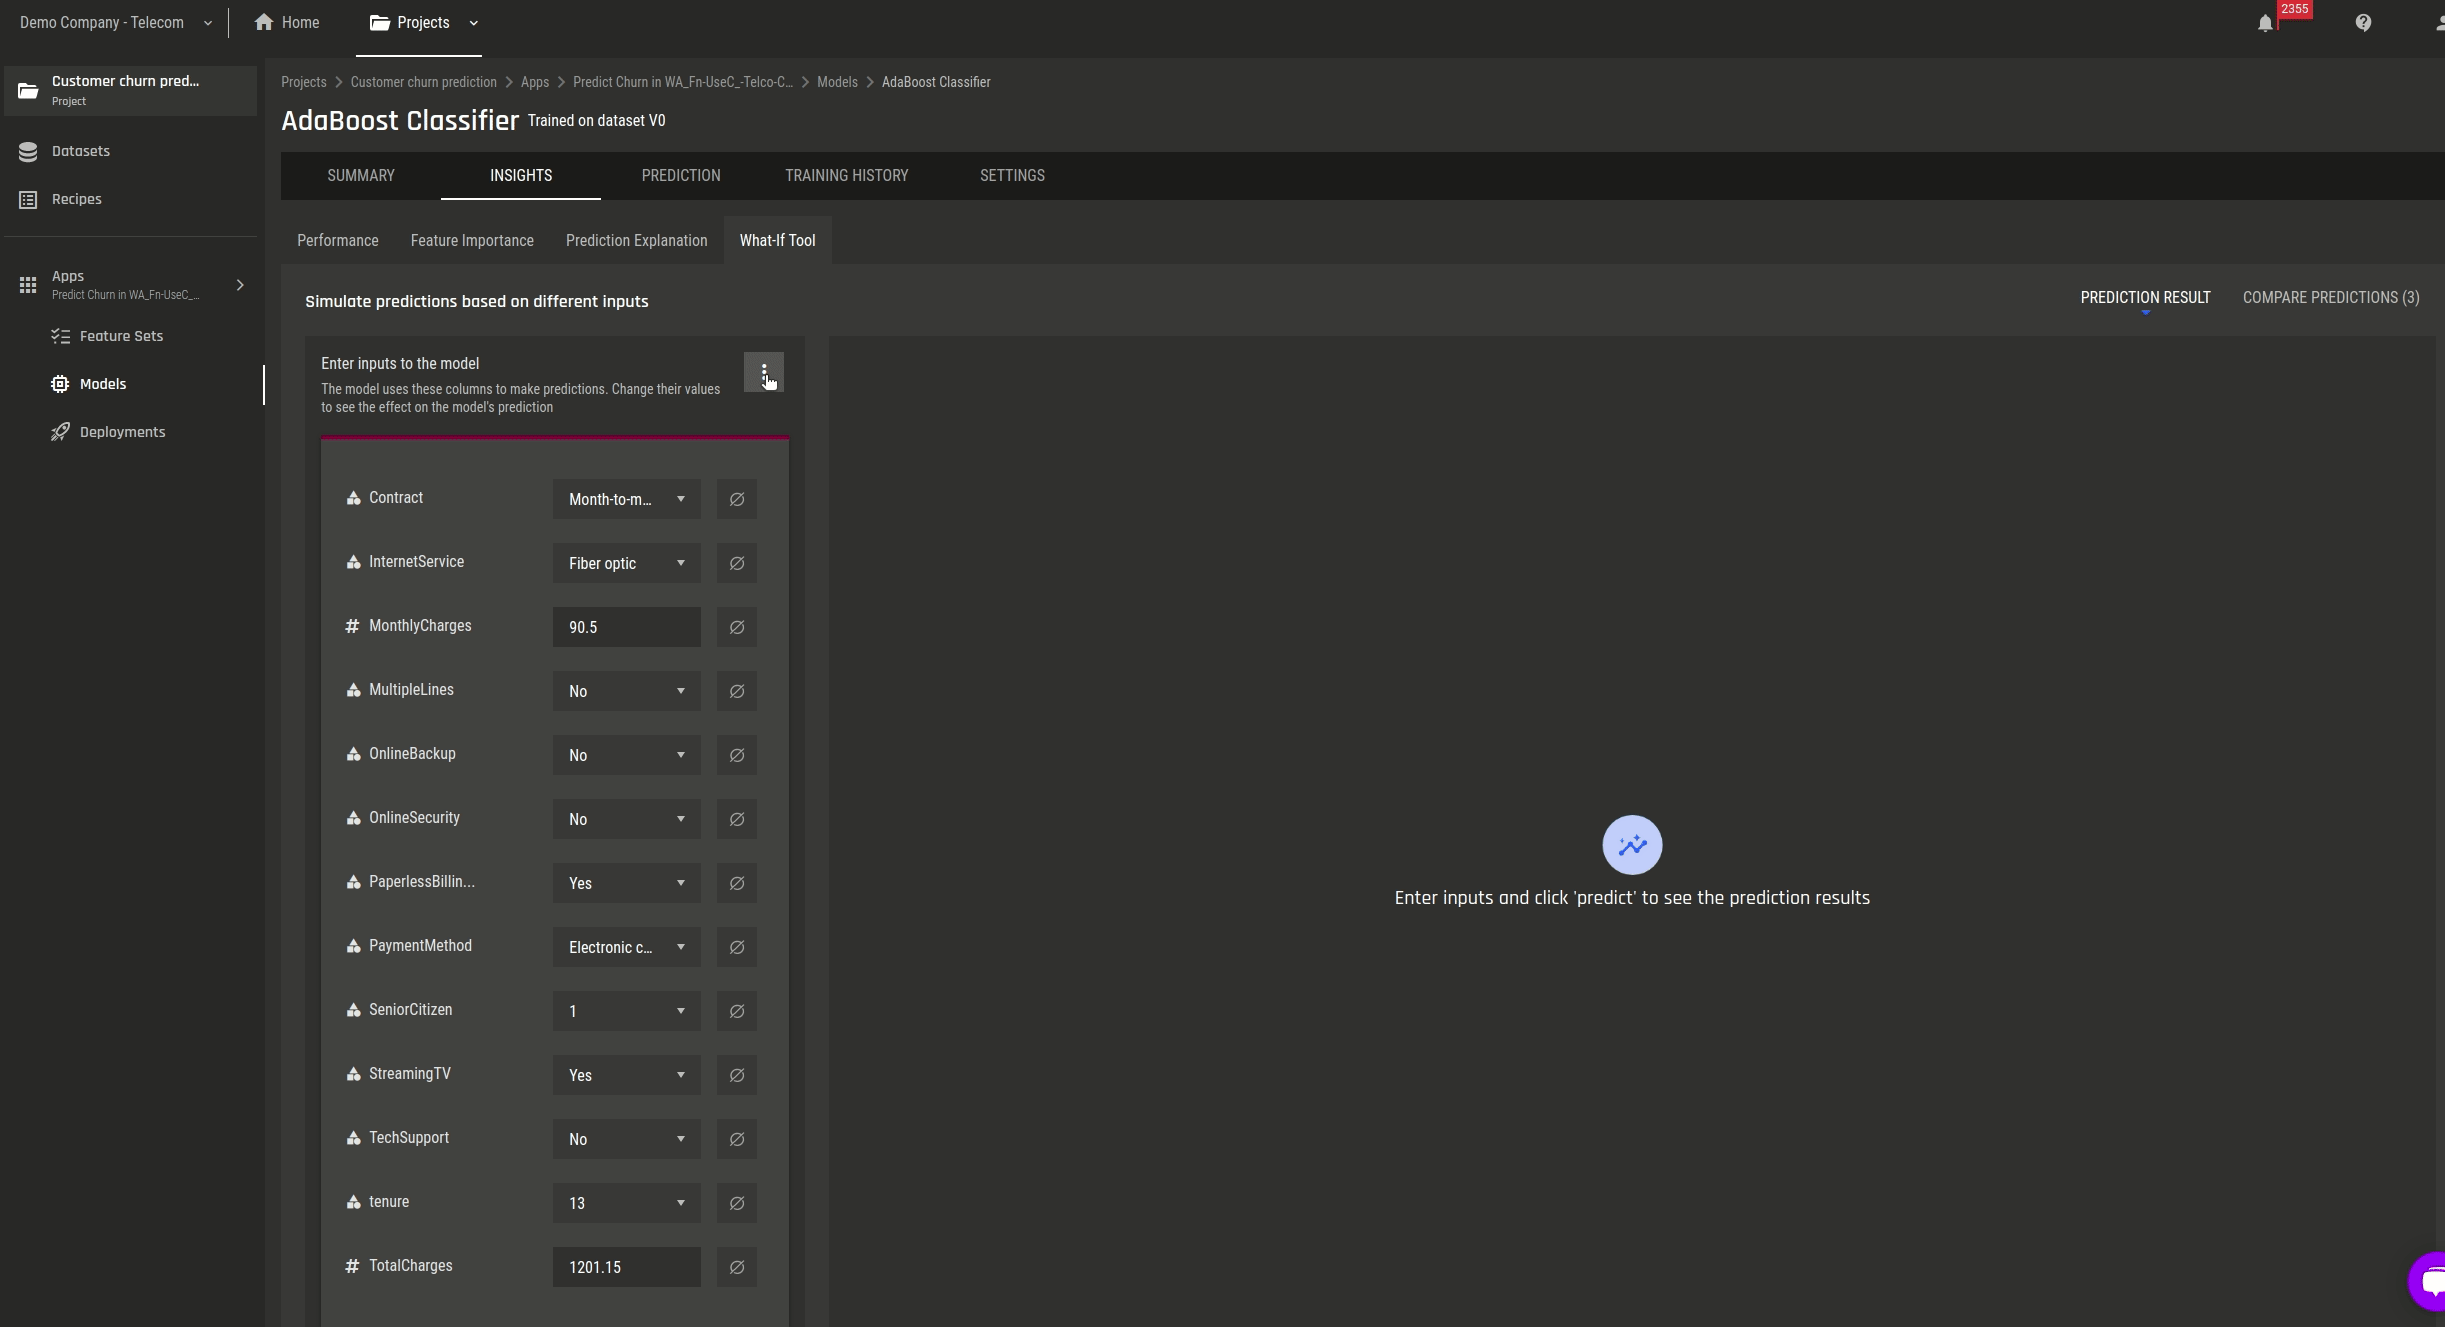
Input the appropriate values in the fields
Note: You can also copy the inputs from a particular example in the Prediction explanation tab to fill the input fields of What-if analysis tool
-
To mark the field as null, click on the “Null” icon on that input field
-
By clicking on the option icon, you can choose to let the Engine:
-
Fetch a random sample from the training data; or
-
Mark all values as null
-
-
Use the checkbox “Include explanation for prediction” to generate explanation along with the prediction
-
Click the “Predict” button
The output is shown on the right-hand side.
Step 3 - Compare individual predictions
-
In the right corner on the right-hand side of the display, click on the “Add to comparison” button
-
Click on the “Comparison” tab to view all the added predictions to compare the different inputs and outputs
Note: You can add up to 5 predictions for comparison here